Introduction to DIY Book Nook
Imagine curling up with your favorite book in a cozy, little corner that you’ve crafted to reflect your personal taste and passion for magic and storytelling. This is what creating a DIY book nook can offer you—a magical escape within the confines of your own home. Not only does this project add a charming touch to your living space, but it also provides a creative outlet to express your love for books and crafting. Whether you’re looking to build a fantastical fairy tale corner or a sleek, modern retreat, constructing your own book nook can be a delightful endeavor that imbues your environment with a sense of wonder and personal style.
Choosing the Perfect Books for Your Book Nook
 Image courtesy: Unsplash
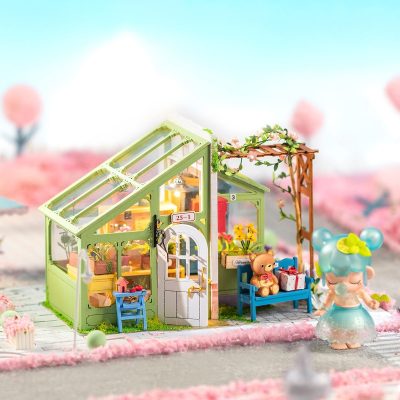
Creating a magical DIY book nook begins with selecting the right books. These books aren’t just for reading; they’ll serve as the structural and thematic foundation of your nook. Ideally, you want books that inspire creativity and whisk you away to a different world.
Selecting Books with Inspirational Settings
When picking books for your nook, think about the settings that inspire you. Are you drawn to the cobblestone streets of a historical romance, the fantastical realms of sci-fi, or the mysterious atmospheres of detective stories? Choose books that reflect these captivating settings. Hardcover books with beautiful spines and covers add an aesthetic appeal and make your book nook not only magical but visually stunning.
Considering Theme and Color Schemes
It’s also essential to consider the overall theme and color schemes of your book nook. Decide on a consistent theme that can tie your books together – be it nautical, Victorian, outer space, or enchanted forest. Similarly, the colors of the book covers can significantly influence the mood. Harmonious colors create a seamless look, while contrasting colors can make each book stand out. Consider these elements to ensure your books complement each other and contribute effectively to the nook’s ambiance.
Crafting Supplies You’ll Need
With the perfect set of books ready, it’s time to gather your crafting supplies. These tools and materials will help you transform a simple bookcase into a bewitching space that invites you to curl up with a good book.
Basic Crafting Tools
For your DIY book nook, some basic crafting tools are essential:
– Measuring tape: to ensure all your additions fit perfectly.
– Scissors and craft knives: for cutting fabrics, papers, and other materials.
– Glue gun and glue sticks: a must-have for secure bonding.
– Paint and paintbrushes: for adding color and making each element unique.
– Pencils and markers: for sketching out designs before you commit.
Ensure you have a clean workspace and organize these tools in a way that they are easily accessible while you work.
Specialty Materials for Magical Touches
To truly bring the magic to your book nook, consider some specialty materials:
– Fairy lights: to create a soft, enchanting glow.
– Miniature figurines: to add character and whimsy.
– Artificial vines or flowers: for a touch of nature.
– Colorful felt or fabric: for crafting small items or decorations.
– Mirrors: small ones can add depth and make the space seem larger.
With these special touches, your DIY book nook will not just be a place to store books but a magical escape that reflects your creativity and passion for reading. Each element adds a layer of charm and invites imaginations to soar.
Designing and Planning Your Book Nook
Sketching Out Your Ideas
The first step in creating your magical DIY book nook is to let your imagination run wild through sketching. Start with a plain notebook and draw what comes to mind when you think of a magical space. Is it a cozy cottage, a secret garden, or perhaps a whimsical castle? Don’t worry about perfection; these sketches are just to help visualize the space. Think about the elements that make it feel special — a fireplace, winding paths, or towering bookshelves. Experiment with different layouts and perspectives until you find one that captures the essence of what you want to create.
Creating a Layout for Your Miniature World
Once you have a sketch you love, it’s time to plan the layout more precisely. Consider the actual dimensions of your book nook — usually, it needs to fit snugly between books on a shelf. Measure the height, width, and depth that you can work with. Then, create a scaled-down version of your ideas, fitting them within these dimensions. This might be a simple floor plan or a more detailed diagram depending on your project’s complexity. Think about where each feature will go, like doors, windows, and major furniture elements.
Adding Personal Touches
To make your book nook uniquely yours, think about the small details that reflect your personality or interests. Maybe add miniature books that are replicas of your favorites or create tiny artwork that mimics your own style. Personal touches can also come from unexpected places—like using fabric scraps from a memorable outfit or event as curtains or tiny carpets. These details don’t just add beauty; they make your book nook a truly personal retreat.
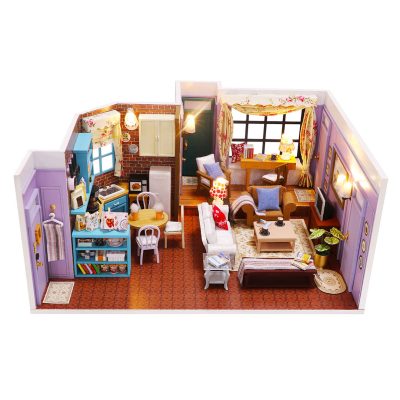
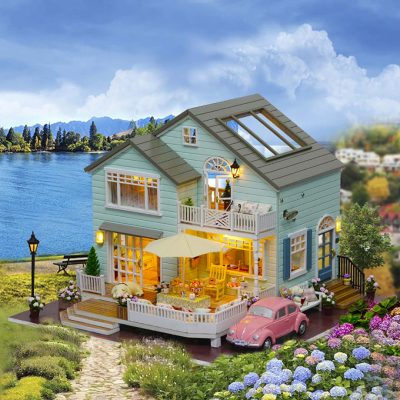
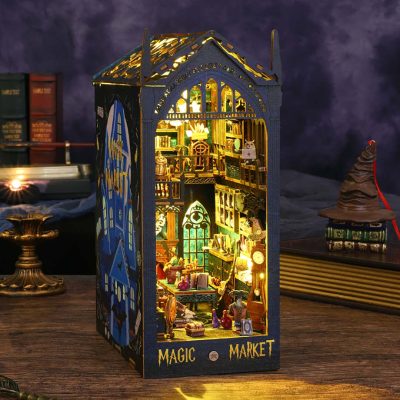
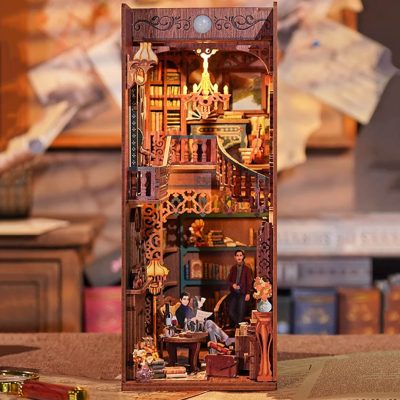
Building Your DIY Book Nook
 Image courtesy: Unsplash
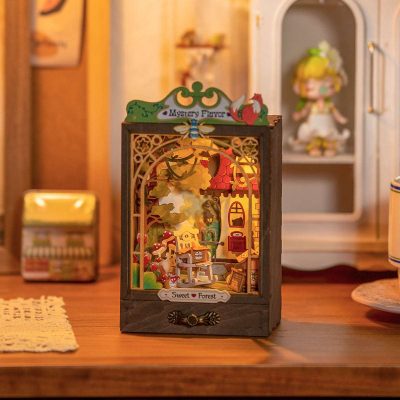
Constructing the Base Structure
The structure of your book nook is its foundation. Usually, this means building a box or backdrop that will fit into your chosen space on the bookshelf. Use sturdy materials like foam board, balsa wood, or even thick cardstock. Cut these materials according to the measurements you determined during the planning phase. Assemble the pieces using glue suitable for your materials—craft glue, wood glue, or even hot glue can work. Ensure everything is square and securely attached so your scene won’t shift when placed between books.
Details and Decorations
Adding decorative details is where your book nook truly comes to life. Based on your initial sketches and layouts, start crafting the decorative elements. Use polymer clay for miniature pots and furniture, or repurpose items like buttons for doorknobs and jewelry pieces for lamp fixtures. Paper can be used for making tiny books or wallpapers. Remember, the scale is crucial; keep elements proportionate to the layout you designed. Painting your structures and details not only adds color but also brings depth and realism to your creation.
Incorporating Lighting for Ambiance
Lighting can transform your book nook from a simple miniature scene into a truly magical space. Consider where light would naturally occur in your scene—perhaps from a tiny lamp, a glowing fireplace, or gentle overhead lights. Use small LED lights which are compact and can be easily hidden within your structure. These lights typically come with batteries, which makes them easy to install without worrying about wiring. Position the lights to create warm, inviting shadows and highlights, adding to the enchanting atmosphere of your miniature world.
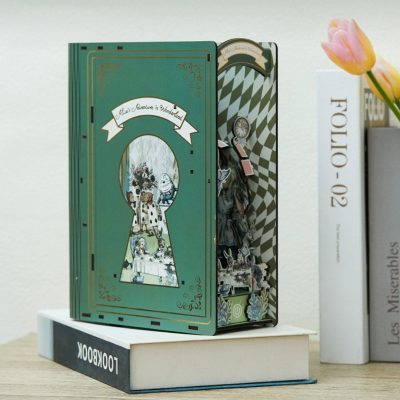
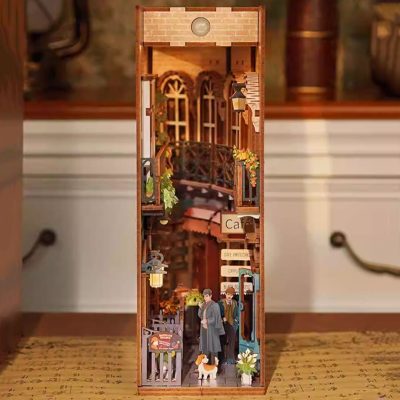
Tips for Bringing Magic to Your Book Nook
Using Optical Illusions for Depth
Creating depth in your DIY book nook can transform a simple shelf into a portal to another world. Utilize mirrors strategically to extend the perceived depth of the space. Place them at the back of your nook or on the sides to reflect the scene, giving an illusion of a much larger area. Painting a background scene or using a deep perspective photo as a backdrop can also enhance the depth. Choose images like winding paths, distant landscapes, or cityscapes that draw the eye inwards, making your book nook look more expansive than it really is.
Adding Miniature Accessories for Realism
The charm of a book nook lies in its minute details. Populate your nook with miniature accessories that match the theme of your chosen book or genre. For a fantasy theme, think tiny dragons, petite enchanted trees, and small mystical cottages. For a detective story, miniature desks, tiny books, and small lamps will set the scene. You can find these miniatures at craft stores or online. Alternatively, DIY these accessories using polymer clay or cardboard. These small details not only enhance realism but also make the space genuinely captivating.
Creating Hidden Surprises for a Touch of Whimsy
To add an element of surprise, incorporate hidden features that are revealed only upon closer inspection. This could be a tiny door that opens to reveal a secret compartment, or small, enchanting creatures that are only visible from certain angles. You can also embed subtle glow-in-the-dark paints or elements that illuminate under UV light. These surprises will delight and intrigue anyone who takes a closer look at your book nook, sparking curiosity and wonder.
Maintaining and Refreshing Your Book Nook
Dusting and Cleaning Tips
Keeping your book nook clean and dust-free is crucial for maintaining its enchanting appearance. Use a small, soft-bristled paintbrush or makeup brush to gently remove dust from delicate areas and miniatures. A handheld vacuum with a brush attachment can help clear out the dust from more accessible areas without damaging any intricate parts. Regular cleaning will keep your nook looking fresh and magical.
Seasonal Updates and Theme Changes
Refreshing your book nook with seasonal decorations or theme changes can keep the magic alive and make it a continuous source of joy. For instance, adorn it with mini pumpkins, colorful leaves, and tiny lanterns during fall, or add miniature snowflakes, a small Santa Claus, and tiny reindeer for winter. Rotating themes not only rejuvenates the space but also allows you to be creative throughout the year.
Avoiding Common Mistakes
When creating and maintaining your book nook, avoid using materials that may damage your books or the shelf. Steer clear of water-based glues near book pages, and be cautious with paints and varnishes that emit strong odors or harmful fumes. Another common mistake is overcrowding the nook, which can detract from its charm. Instead, aim for a balanced layout that allows each element to be appreciated without clutter.
Showcasing Your Magical DIY Book Nook
Once you’ve put the finishing touches on your magical DIY book nook, it’s time to show it off. From social media sharing to hosting book-themed gatherings, there are numerous ways to celebrate your creation.
Sharing Your Creation on Social Media
A great way to share your DIY book nook is through social media. Platforms like Instagram, Pinterest, and Facebook are perfect for showcasing creative projects. Here are a few tips for making the most of your social media posts:
– Take high-quality photos: Good lighting and clear images will help highlight the details of your book nook.
– Use relevant hashtags: Enhance visibility with hashtags like #BookNook, #DIYCrafts, and #HomeLibrary.
– Share your process: People love seeing the transformation. Post before and after photos or even a time-lapse video of your project.
Hosting Book Nook Parties and Events
Another enchanting way to showcase your book nook is by throwing a themed party or event. Invite friends and family for a reading session or a small gathering centered around the love of books. Here are a few ideas to consider:
– Book swap: Encourage guests to bring a book to swap with others.
– Themed decorations: Coordinate decorations with the theme of your book nook.
– Storytelling: Have a storytelling hour where guests can read excerpts from their favorite books within the cozy confines of your new creation.
Book nooks not only expand your reading experience but can also become a centerpiece for creative entertainment and sharing.
Conclusion: The Enchantment of DIY Book Nooks
Creating your own DIY book nook is more than just a fun crafting project; it’s a gateway to adding a touch of magic and personal flair to your reading space. Whether nestled on a bookshelf or perched in a cozy corner of your room, these charming miniatures serve as an invitation to dive into your favorite stories. Each book nook you create not only enhances the aesthetics of your environment but also stirs the imagination, making every reading session an adventure. Remember, the true magic of DIY is in making something uniquely yours. So, gather your materials, unleash your creativity, and transform a simple nook into a mesmerizing retreat. Enjoy building your magical space!